[Title] [text TOC] [image TOC] [Site Search]
 [Donation]
[Donation]
[Donation]
| Quick Change |
|---|
| Materials | Tools |
|---|---|
|
Small powerful magnet 1/2" magnetic tape Clip-art 3/4" wooden stick PVC ring |
E-6000™ glue Scissors |
See the General Chapter for more instructions, hints, tips, and ideas.
Have you ever been to a meeting where the theme changed? How about an Arrow of Light and Crossover ceremonies?
Maybe you don't want to be bothered with making a lot of PVC rings.
Well, this is just the slide for you! It uses one ring and a magnet to attach the decorative part to the ring part of the neckerchief slide. Instead of sliding the ring off and sliding another ring on, you simply pull the decorative part off, then put another one in its place.
The more I think about this idea, the better I like it. The weakest part of almost every slide is where the decorative part attaches to the ring. This does away with that altogether. Another thought is maybe you have a neckerchief made of a material that is hard to get a ring to stay on. You could make one ring up (see Keep slides on) that works well, then use it with all your decorative slides.
The magnetic tape is flexible and has one side that is sticky. It is available in craft stores.
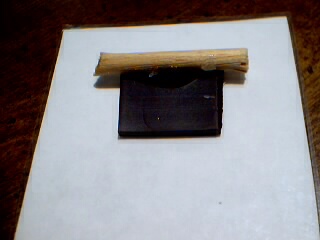
First make up several Clip-art neckerchief slides but instead of attaching PVC rings to the back, stick a 1/2" piece of magnetic tape to the back. Then using E-6000™ glue a 3/4" piece of wood at the top of the magnet (actually on the magnet). I used dowel rod, but you could use anything handy (like a craft or Popsicle stick). The wood acts as a guide so you can make the slide hang straight.
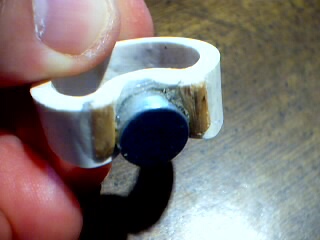
Next, make the ring. Start with a small but powerful magnet (the stronger it is the better). They can be found in craft stores. Get the PVC ring hot (See Rings for instructions). When it is pliable, mash it down on the magnet. You want the PVC ring to be pliable enough that the ring goes completely around the magnet and touches the surface on which you are pushing it. This will make a nice flat surface for the clip-art to sit. You also want the top of the ring to be flat so the piece of wood sits level. You may have to sand the ring with sandpaper to make it flatter.
Determine which side of the strong magnet attracts the best. Place one of the clip-art slides you made face down on a flat surface. Hold the magnet in one hand and slowly lower it until the clip-art slide jumps up to the magnet. Remember how high the clip-art jumped. Next, turn the magnet over and go through the same procedure. Put some E-6000™ glue on the side that the clip-art jumped the shortest distance and put it into the PVC ring you prepared.
To use the ring, put the PVC ring on you neckerchief. Take a clip-art slide and let the magnets attract and hold the clip-art to the ring. Gently pull down on the bottom of the clip-art to make sure it is on straight. A quick feel with your finger can verify that it is on straight.
If you really want to make the slide stay on straight, you could add a second piece of wood below the magnet to make it like a docking station. Use the magnetic PVC ring to get the proper spacing.
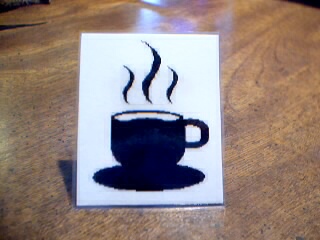
Some idea for clip art that you could use:
You could do the same thing with Velcro. At craft or fabric stores, you can buy rolls of velcro that are cut into 1/2" squares. Simply attach one side of the Velcro to a ring, and the other to the back of a slide.
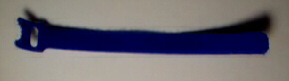
Here's another idea using Velcro. There is a strip of Velcro called a tie wrap that is used in electronics to keep wires out of the way. It is available through BG Micro. The Velcro hooks are on one side of the tie wrap and the loops on the other. You can make the entire ring using a tie wrap since it will stick to itself. This gives you an adjustable size ring.