
[Title] [text TOC] [image TOC] [Site Search]
 [Donation]
[Donation]
[Donation]
| Branding |
|---|
| Materials | Tools |
|---|---|
|
Leather or wood PVC ring |
Propane stove or torch Branding Irons E-6000™ glue |
See the Leather Chapter for more instructions, hints, tips, and ideas.
You have to be real careful with branding. Moving a red-hot piece of metal around when you have children (or even adults) trying to see what's happening can be very dangerous. Set up an area so that you can control/restrict access. It helps to have wooden tables or at least a large flat piece of wood to work on.
Use the large propane stoves to heat up the branding irons. We're not talking about your barbeque grill; we're talking about the stoves they use with the 5 gallon pots, that sound like jet engines when you turn them on. These will heat up the irons faster which makes for less idle time. Propane torches used to solder copper pipe can also be used, but is more difficult because you have to move the branding iron around to get it uniformly heated on the small flame.
You can brand pieces of leather, wood (iron needs to be real hot), the bills of hats (iron needs to be cooler), boots, plastic mugs, and many other things. You may have to experiment. Keep a bucket of water handy in case you have to cool something off real fast.
If you are trying to brand something that is flexible like moccasins or shoes, use something like a piece of wood or a cup to make it rigid.
Branding is simple. Just get the branding iron very hot by placing it into the fire. When it is red hot, carefully place the iron where you want the brand and hold it there until you think it has burned enough. Then remove the iron and return it to the fire. You may need to experiment to find the best temperature for the branding iron. Wood needs the hottest iron, then leather, plastic and finally fabrics need the lowest temperature.
You can brand several pieces of leather one after another. Things like wood and boots must be done one at a time because they take more heat and cool the brand down.
For round items like walking sticks and the backs of boots, roll the object while the brand is in place. Make sure the iron doesn't slip.
If the brand doesn't come out dark enough, you can try placing the iron on it a second time, but you have to be careful to line it up just like the first time or the image will be doubled. If part of the brand didn't come through (maybe the surface was warped), you can touch it up using a wood burner or simply use something like a long screwdriver as a branding iron.
A lot of Boy Scout camps have their own brand that you can borrow.
Try making your own branding irons from coat hangers. Leave an 8 inch or more handle (remember that metal conducts heat up the handle). Make sure the branding iron is flat. You can clamp it in a vise and hammer it flat against the top of the vise. You could even make a wooden (a good insulator) handle that screws together to hold the branding iron in place.
If you are fortunate enough to know a blacksmith, you may be able to get their assistance in making branding irons.
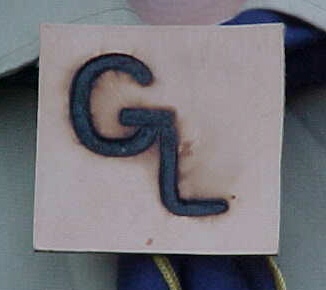
Clean off any extra burnt debris around the brand and then glue a PVC ring to the back using E-6000™ glue.