

[Title]
[text TOC]
[image TOC]
[Site Search]
 [Donation]
 |
Whirligig |
 |
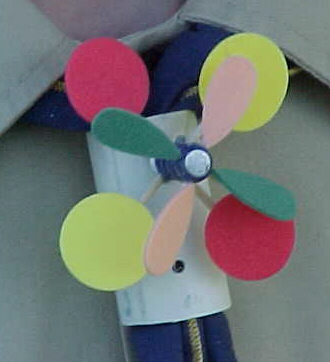
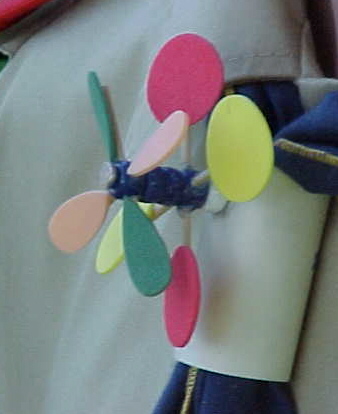
The instructions are for a single bladed whirligig.
| Materials |
Tools |
Pony Beads
4" of 1/16" dowel rod
Foam cutouts
2" or longer Nail
1 1/2" long PVC ring |
Knife
Hot Glue
Drill with various bits
Hacksaw
File
White Glue
"C" clamp |
See the Moving Chapter for more instructions, hints, tips, and ideas.
For younger boys, the first four steps can be done ahead of time.
- Place one pony bead in the "C" clamp. Using a drill bit smaller than the dowel rod,
drill one hole all the way through the pony bead.
- Put the dowel rod partially in this hole. Re-clamp the bead so that the next hole you
drill will be perpendicular to the first.
- Using a drill bit smaller than the diameter of the nail, drill a hole through one wall
of the PVC ring about 1/3 down from the top.
- Cut the nail to size. The nail should go completely through the PVC ring and touch the
backside. Outside of the ring, you need to leave just enough room for the two pony beads
you will use. File off the sharp edges of the nail.
- Cut the dowel into four 1" long pieces. Hint: cut one piece then use it to measure the
other three.
- Glue the sticks in to the bead using E-6000™. Make sure none of the glue or the dowel
rod stick into the center hole of the bead. Hint: If something does get in there,
carefully use a drill to get it out.
- Glue foam onto sticks using white glue. Tilt all of the foam pieces to the same
side. The white glue should be thick enough to hold the foam in place without support.

- Allow time to dry.
- Put blade on nail, add another pony bead to nail.
- Tap the nail into the hole. Make sure blade can turn freely.
Use a thick walled 3/4" PVC ring.
Hint: Use some of the techniques you used to make the Pinewood Derby cars to make the
whirligig turn easier. Graphite really helps!
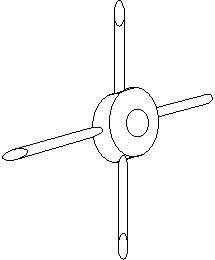
A two bladed whirligig can be made by simple adding an extra blade and some extra pony
beads between the blades so they don't hit. Tilt the foam on the second blade in the
opposite direction so the blade turns in the opposite direction. Make the second blade
larger than the first simply by gluing the foam so it sticks half off the blade. See the
illustrations below.


Drawing of bladed tilted in the opposite direction and blade half glued onto dowel rod
Copyright © 2001 Vince Hale