
[Title] [text TOC] [image TOC] [Site Search]
 [Donation]
[Donation]
[Donation]
| Pumpkin |
|---|
| Materials | Tools |
|---|---|
|
2"x1.5" diameter wood PVC ring |
Carving knife Pencil E-6000™ glue |
See the Wood Carving section for more instructions, hints and tips.
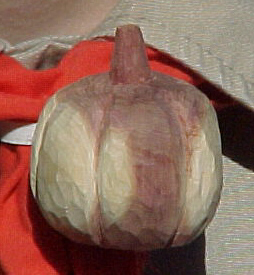
This looks like an easy project, but it involves a lot of cross grain carving which makes it hard cutting. Still, it is a good project for beginners.
Start with a cylinder of wood. The one in the photo is cedar. A tree limb is a great source of material for this project. You may want to make your pumpkin flatter as you look at it from the top, so that it doesn't stand out so far from your neckerchief.
Decide which end is going to be the top and draw a small circle near the middle of the top for the stem of the pumpkin.
Start rounding the edges on the top and bottom. Cut from the stem toward the edge to form the stem. When you get the pumpkin rounded to the shape you want, draw the lines for the grooves.
Make a cut down the line and then make a V notch on each side of the first cut. Widen the groove and smooth it out. Continue doing the other grooves around the pumpkin.
Clean it up by brushing and a little sanding.
You could paint the pumpkin, put a clear finish on it, or just leave it natural.
Glue on a PVC ring to complete your neckerchief slide.