
[Title] [text TOC] [image TOC] [Site Search]
 [Donation]
[Donation]
[Donation]
| Dipped Candles |
|---|
| Materials | Tools |
|---|---|
|
Wax Wick |
Tall can Clothes hanger Knife |
See the Candles Chapter for more instructions, hints, tips, and ideas.
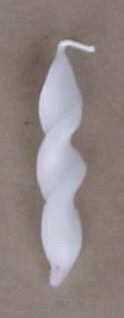
Another name for a dipped candle is a taper. The natural shape of a dipped candle is a taper form.
Make a rack for dipping the candles from a coat hanger. Bend loops about an inch from the hook and cut off any excess wire. That way the candles will be a couple inches apart so they shouldn't touch, but they are close enough to dip together in the wax. The hook makes it handy to hang the candles while they cool.
You'll also need a deep can wide enough for the two candles and taller than you want the candles. Large juice cans are very convenient.
Melt the wax and add any additives. Remove the wax from the heat. If the wax is too hot, it won't build up on the wick - just let it cool for a few minutes. If the wax is too cool, it will look cloudy and a film will form on the surface - heat it up slightly.
To make one candle (using the rack described above), cut the wick 2" longer than the can is tall and tie the wick to the hanger.
To make two candles, cut the wick twice as long as cans are deep plus the space between loops in the hanger. Thread the wick through the two loops in the hanger and make the ends even.
Prime the wick by holding it in the wax for about ten seconds. Let it cool and drip over the can of melted wax, then pull it out straight.
When dipping go down until the wick touches the bottom of the can and then lift it straight back up - don't hold the wick in the wax and no partial dips (the candle will taper naturally). Hold the candles over the can until they stop dripping. Straighten them and flatten any blemishes. Hang them up for a couple minutes to cool. Don't let the candles touch.
If you are in a hurry, you can dip the candles in cold water to cool them faster. Alternate dipping in the wax and water.
Continue dipping until the candle is as wide as desired.
You may need to add more wax (and other additives) if you are making a number of candles from the same can of wax.
Trim the bottom with a knife while the candle is still warm. After the candles have cooled, cut them apart and trim the wicks to 1/2".