
[Title] [text TOC] [image TOC] [Site Search]
 [Donation]
[Donation]
[Donation]
| Ice Candles |
|---|
| Materials | Tools |
|---|---|
|
Half pint milk carton 7" Wick Wax Ice |
Clay or play dough Hammer Nail Mini binder clip Craft stick Two 1/2" strips of wood Knife |
See the Candles Chapter for more instructions, hints, tips, and ideas.
Use the general instructions for molded candles. Photos of the molds are shown on this page also.
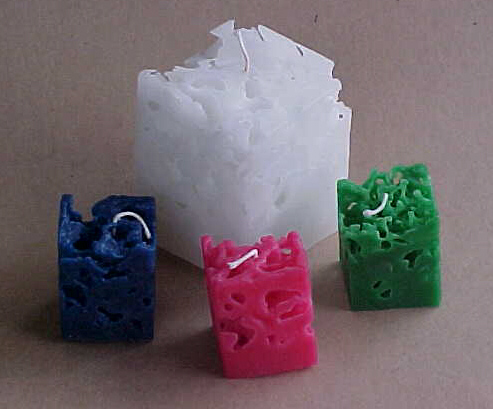
These candles look like Swiss cheese. They are so easy and fast to make they are a hit with the kids of almost any age. These candles are delicate, so be careful when handling. Hold them by the base where the wax is more solid.
It only takes about 10-15 minutes to make them if you have the wax melted before hand. Then they need to cool for about 45 minutes before you take them out of the mold. The ice helps the wax cool faster and there's no dimple caused by the shrinking wax.
Use the small half pint milk cartons. Our school uses these every day for lunch so there is an almost unlimited supply. Have someone from school save the cartons for you. Open the carton top completely, wash them, and let them dry.
The two 1/2" strips of wood are used to set the molds on while the candles harden. You can use ones several feet long to set the whole group on. It's much easier and more stable than doing pieces for each individual. Use a permanent marker to put the owner's initials on the carton, so they don't get mixed up.
Ice cubes work best. Crack them into pieces with a mallet or hammer to give it more random shapes. Use only the pieces that are about the size of a dime or marble. Too small and the wax won't be able to fill in the spaces between the ice. Too large and the candle will be too delicate and break easily.
You'll need a piece of wax about 2"x2"x2" for each candle.