

[Title]
[text TOC]
[image TOC]
[Site Search]
 [Donation]
| Materials |
Tools |
3" of 3/4" Angled aluminum
1/2" Butterfly nut and bolt
1.5" x 2.5" Leather
2-3' of 1" Elastic
Triglide
|
Hacksaw
Drill
File
Vise
Leather hole punch
Knife
Scissors
Needle and thread
White Glue
E-6000™ Glue
|
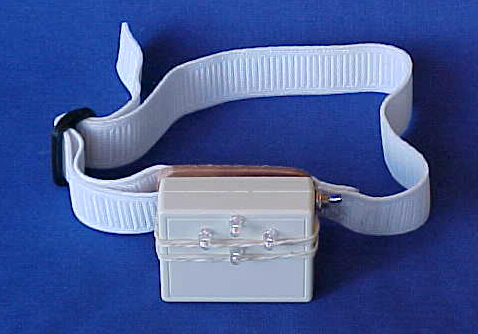
After several iterations, much planning, brainstorming, and experimenting I have come up with a headband that is easy to make and uses only commonly available materials. It really is easy to make, you will probably spend more time gathering the materials than assembling them.
The whole headlamp including battery weighs only 3.6 ounces! It will run for days (I've gotten more than 14 days) on a single 9-volt battery!
These instructions assume that you have already made the light for your headlamp. If you haven't, then see the following pages:
General information on constructing an LED flashlight.
Information on a one or four LED circuit.
- Make the bracket
The bracket is made from 1/16" aluminum that is shaped at a right angle. Each side of the right angle is 3/4" long. Angled aluminum can be purchased at a hardware store for about $3 for a 3-foot section. Actually, you could probably make the bracket from four strips of leather about 3/4" x 1.5". Let me know if you try this.
Cut four pieces of angled aluminum about 3/4" wide. Drill holes for the bolt in one side of each of the right angle pieces about 1/8" from the edge as shown in the photo. Make sure the holes line up (drilled in the same location) so when the bracket is assembled the mounts will be even or flush with each other. File the edges to remove any sharp burrs. Using the file, roughen up the outside of the side without the hole. This will make the glue stick better.


Drawing and Photos of Bracket
- Glue bracket to light
Glue the bracket to the back of the light using E-6000™ Glue.
- Cut out leather mount
The leather is about 3/32" thick. It can be found in craft stores. You will have to cut it to size with a sharp knife.
Draw 1" slots in the leather as shown in the illustration. Use the hole punch to put holes at the ends of the slot. Then cut the slot using a sharp knife.
Notice that the illustration shows three slots. The one on the top is for a band that goes over the top of your head. This will help hold the headlamp more securely. If you plan to wear the headlamp while doing strenuous activities, you will probably want this. I have found that the single band around my head is fine for things like setting up camp. However, I put the third slot in now because it would be more difficult to do after the headlamp is assembled.
Headlamp Mount
- Make the headband
The triglide is used to adjust the fit of the headband. It can be found in good camping stores and some hardware stores. You may also have a supply close at hand. My boys go through book bags about once a year. You can save the plastic clips from these for use on many projects. You can also make one fairly easily from a scrap piece of plastic or leather.
Put one end of the elastic band through one of the slots on the side and sew it to itself. Put the triglide on the elastic band. Now put the other end of the elastic band through the other side slot and then feed it back through the triglide. Adjust the elastic band and clip so that they fit your head comfortably. Leave some extra elastic band in case you want to put your headband on over a hat. Cut off the excess elastic band. Put a little bit of white glue on the ends of the elastic band to keep it from unraveling.
If you want to put an elastic band on the top, wrap the top band around the headband and sew it to itself. This will form a loop around the headband that will allow the top band to slide on the headband. You will want the loop to fit tightly so the top band doesn't slide too much.
Now slide the top band through a triglide. Put the elastic band through the top slot in the leather and then back through the triglide. Put a little bit of white glue on the ends of the elastic band to keep it from unraveling.
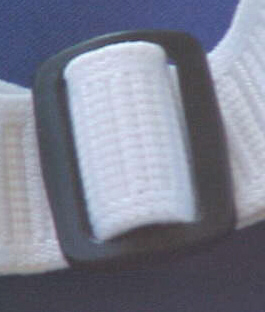
Triglide
- Final assembly and glue bracket to the leather
Assemble the bracket using the butterfly or wing nut and bolt. Then glue the bracket to the front of the leather using E6000™ Glue.
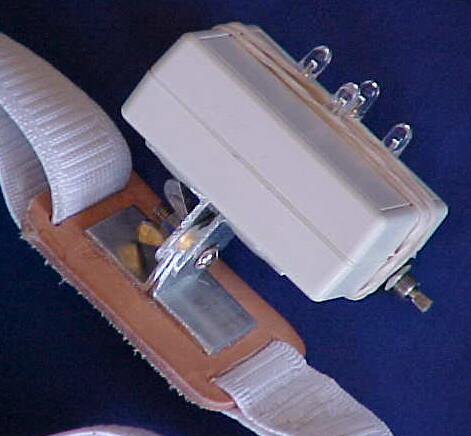
Close-up of Assembled Bracket
- Final adjustment
If you didn't drill the holes close enough to the edge of the angled aluminum, they will keep the bracket from rotating completely (they will act like a stop) and you won't be able to adjust the light to shine low enough to be at the center of your vision. You can file the corners off the angled aluminum to give it more clearance so the bracket will rotate more.
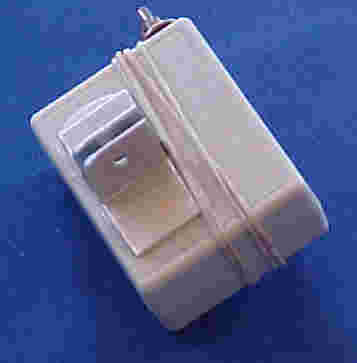
This headlamp weighs just 3.6 ounces including the battery. Notice that I have cut the switch paddle shorter. This is to keep it from turning on as often in my pack. Don't cut it too short, as there is a round thing in the switch paddle that makes it work. If you cut it too short, the round thing will fall out and get lost and the switch won't work anymore. (Been there, done that :-))
The materials for one headband will run about $5 USD. However, you will have angled aluminum for 11 and elastic for 4 more headbands. So, the cost per headband is about $1 USD. This brings the total cost of the headlamp to about $13 USD.
Ready for more fun with LEDs? Try these out:
Copyright © 2002 Vincent Hale