[Title] [text TOC] [image TOC] [Site Search]
 [Donation]
[Donation]
[Donation]
| Leather Pouch or Case |
|---|
| Materials | Tools |
|---|---|
|
Rectangular piece of Leather Waxed Thread Velcro |
Thonging Chisel tool Mallet Scrap piece of wood Large-eyed needle |
See the Leather Chapter for more instructions, hints, tips, and ideas.
Read the page on instructions and hints on lacing and instructions for sewing on loops before you start.
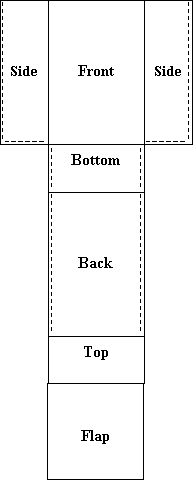
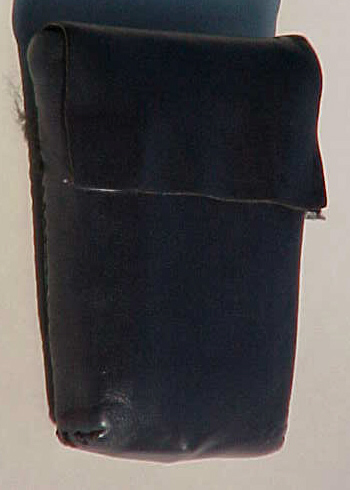
With a little bit more work, you can make nice looking 3-dimensional cases for things like flashlights, knives, PDAs, cell phones, GPS, ... Measure the height, width, and depth of the object.
Use a string or cloth measuring tape to help you measure around the width and length of the object. These are the circumference measurements. Add some extra to the length for a good size flap; you can always make it smaller. The width is a bit tricky. The small part on the template below should be the same as the width of the object and will be the back and flap. The wider section which is the front and sides is the width circumference minus the width. Add 1/4" or more for stitching. You may want to add a little more in the length and width to give you a little extra room in the pouch for a thumb guard for wood carving, business cards, etc.
Make a template on paper (see below) of the size of the leather. Then follow the instructions above. Make sure that you have the same number of holes on each side and the bottom.