
[Title] [text TOC] [image TOC] [Site Search]
 [Donation]
[Donation]
[Donation]
| Square or Circle Burst |
|---|
| Materials | Tools |
|---|---|
|
1/4 x3x3 inch wood 5/8 inch nails colored thread pattern paint PVC ring |
Hot Glue Glue Scissors hammer Paint brush Drop cloth |
See the String Chapter for more instructions, hints, tips, and ideas.
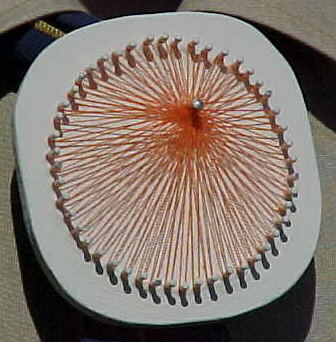
The Circle Burst and Square Burst are very similar. The idea is to run a thread from one central nail to every other nail in the project. A special case of the Circle Burst is where the central nail is one of the nails in the circle itself.
Make sure that the thread is always kept tight. Looping the thread completely around each nail will help to keep tension in the thread.
Start by tying (use a square knot) the thread to the central nail.
Put a drop of glue on the knot, let it dry and trim off excess thread.
Now you need to make a decision. There are two methods that can be used to finish the project. These are described separately below.
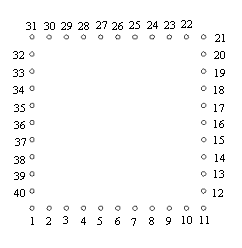
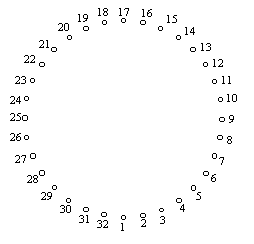
In method 1, the pattern goes from one nail on the perimeter and continues around the perimeter in one direction (1, 2, 3, 4, ...). This results in the thread going up the central nail in a spiral.
Method 2 goes from one nail on the perimeter and alternates going clockwise with one then counterclockwise with the next (12, 13, 11, 14, 10, 15, 9, 16, 8, 17, ...). This results in the thread going up and down the central nail smoothly.
It does not matter which perimeter nail you start with. The thread goes from the central nail to the perimeter nail, is looped once around the perimeter nail and goes back to the central nail where it is looped around. Then proceed to the next nail (either in one direction for method 1 or alternating directions for method 2).
You will want to push the thread on the central nail down toward the wood so that each new loop is above all previous loops.
When you have made the loop around the last perimeter nail, run the thread back to the central nail, loop it around the nail, and tie it to itself using a square knot and a drop of glue. Trim off excess thread.