
[Title] [text TOC] [image TOC] [Site Search]
 [Donation]
[Donation]
[Donation]
| String Art Star |
|---|
| Materials | Tools |
|---|---|
|
1/4 x3x3 inch wood 5/8 inch nails colored thread pattern paint PVC ring |
Hot Glue Glue Scissors hammer Paint brush Drop cloth |
See the String Chapter for more instructions, hints, tips, and ideas.
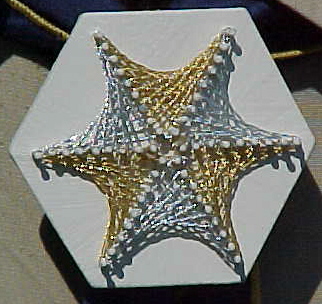
There are six separate sections to the Star. Each section can be done in a different color.
Make sure that the thread is always kept tight. Looping the thread completely around each nail will help to keep tension in the thread.
Start by tying (use a square knot) the thread to one of the points on a spoke closest to the center of the star (labeled A1).
Put a drop of glue on the knot, let it dry and trim off excess thread.
Next run the thread around the outermost nail of an adjacent spoke (labeled B6). The thread should make one complete loop around the nail.
Now run the thread to the next nail on spoke A (labeled A2). The thread should make one complete loop around the nail.
The process continues A2 to B5 to A3 to B4, ... until finally B2 to A6 to B1.
Tie the thread onto nail B1 using a square knot and a drop of glue. Trim off excess thread.
Repeat the process for the 5 other sections.