
[Title] [text TOC] [image TOC] [Site Search]
 [Donation]
[Donation]
[Donation]
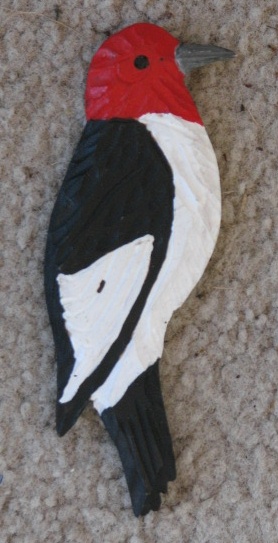
| Red-headed Woodpecker |
|---|
| Materials | Tools |
|---|---|
|
2" x 3" x 1/4" basswood PVC ring |
Stick glue Scissors Scroll saw Knife U gouge V gouge Pencil Sandpaper Paint and brush Toothpick E-6000™ glue |
See the Wood Carve section for more instructions, hints and tips.
For this project, have the grain of the wood running vertically.
Print and cut out the template and glue it to the wood using a glue stick. Cut out the woodpecker with a scroll saw.
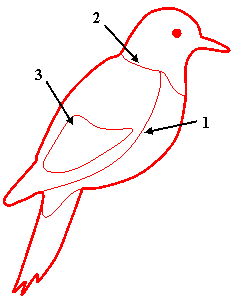
Remove any remaining paper using your knife and/or sandpaper. Clean up the carving if necessary.
Now you are almost ready to paint. The woodpecker can be made into a neat looking neckerchief slide, ornament, pin, SWAPS, or necklace. Whatever you are going to make, it will be easier to hold for painting if you glue something on the back now. You can glue something on temporarily using hot glue. Later, you can remove this and glue on a permanent fastener using E-6000™.
Paint the head red, then paint the black, and finally the white. Paint all the way around onto the back so that no plain wood shows. Mix the black and white to make gray for the beak.
After all the paint has dried, draw the separation of the beak with a pencil.
Take a toothpick to apply a small dot of black for the eye. Note the location of the eye just above the center line extended through the beak.